You can add or edit roles (formerly referred to as permissions) by editing a unit (formerly organizational unit). You must be a superuser or an Assessment Manager in a unit to perform this action.
In the New UI
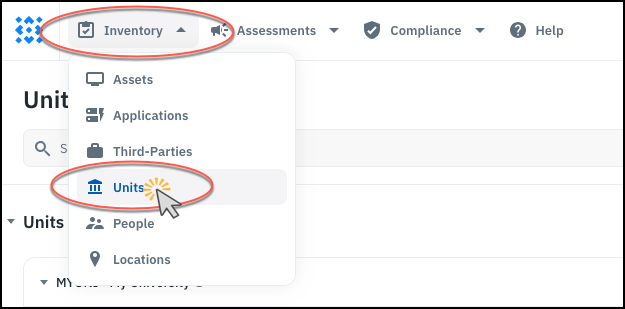
- Go to Inventory → Units and locate the unit to which you wish to assign a role.
-
Click the unit name to bring up the sidebar. In the Assigned Users area, click the + sign to add a new role to the unit.

-
Then, in the Assign Roles dialog, click the + sign next to the new role that you want to add.

-
Or, if you are adding another person to a role that already exists for the unit, click the + sign next to that role.

-
Click on the person you want to assign to that role, then click off the selection area so you can see the bottom of the dialog again.

- Finally, click Save.

In the Old UI
- Navigate to the Settings page and click the Organizational Units link.

- To add an individual to an unit, click the edit button (which looks like a pencil) next to the unit name in the table.

- From here, you can edit the name, code and parent of a unit. To add a person to the unit, click the Permissions link.

- Click the + sign to add a new permission. Start typing in the search box to find the person, then choose the desired role from the drop-down list. You can add as many permissions as needed, then click Save. (Note that each individual person may be assigned more than one role in a unit.)

- To remove a permission from the unit, click the trash can icon next to the permission you want to remove, then click Save.

- You can upload multiple permissions using a CSV file. On the Organizational Units section of the Settings page, next to the upload CSV button is a button that lets you upload permissions.

See also: Reference: CSV Upload
You can also assign roles to a person from the People Inventory page.
You can upload multiple roles at one time using the Import Dialog on the Units Inventory page.